Getting Started
To set up AI Personal Assistant for your email, click on the
AI Personal Assistant tab in the left sidebar. Or visit this link.
Creating Rules
You can create rules in two ways:Natural Language Instructions
- Type instructions in plain English in the text area
- Use the example instructions on the right for inspiration
- Combine multiple instructions for comprehensive email management
- Click
Create Rulesand the AI will convert your instructions into rules
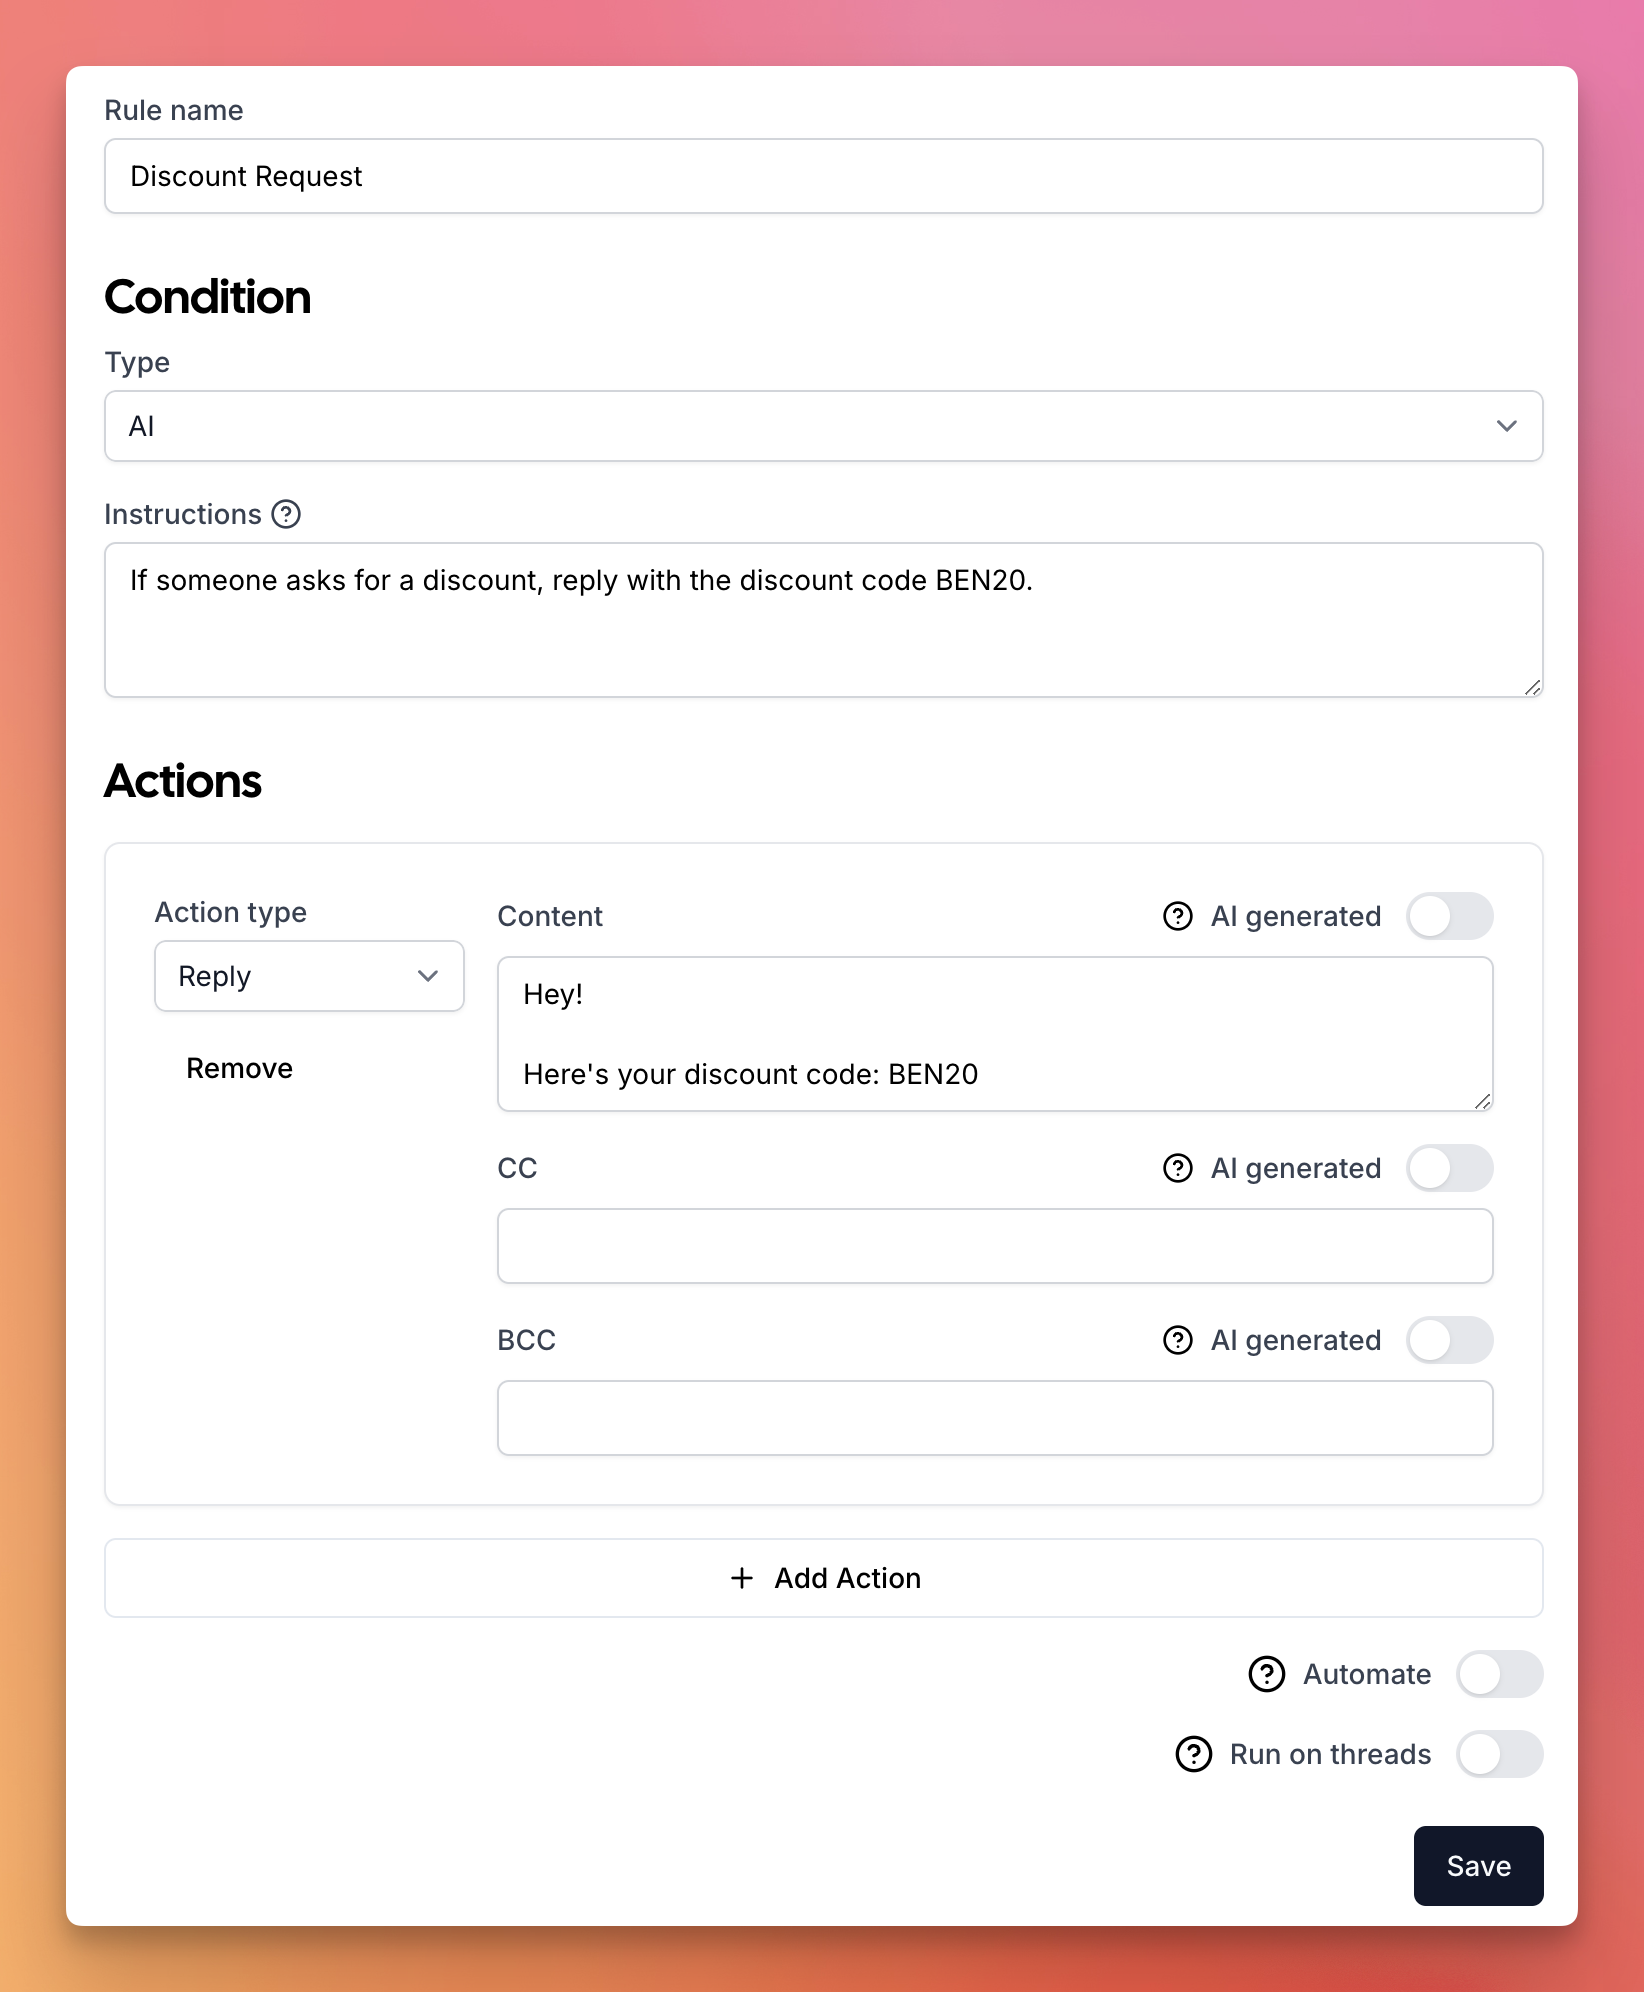
Manual Rule Creation
For more precise control, create rules manually by clicking theManually add rule button.
AI Chat
You can also create and manage rules through the AI Chat — just describe what you want in plain English.Rules
On the Rules page, you can view and edit your rules. When you save your prompt the rules will be automatically created for you. But you can also decide to create rules manually.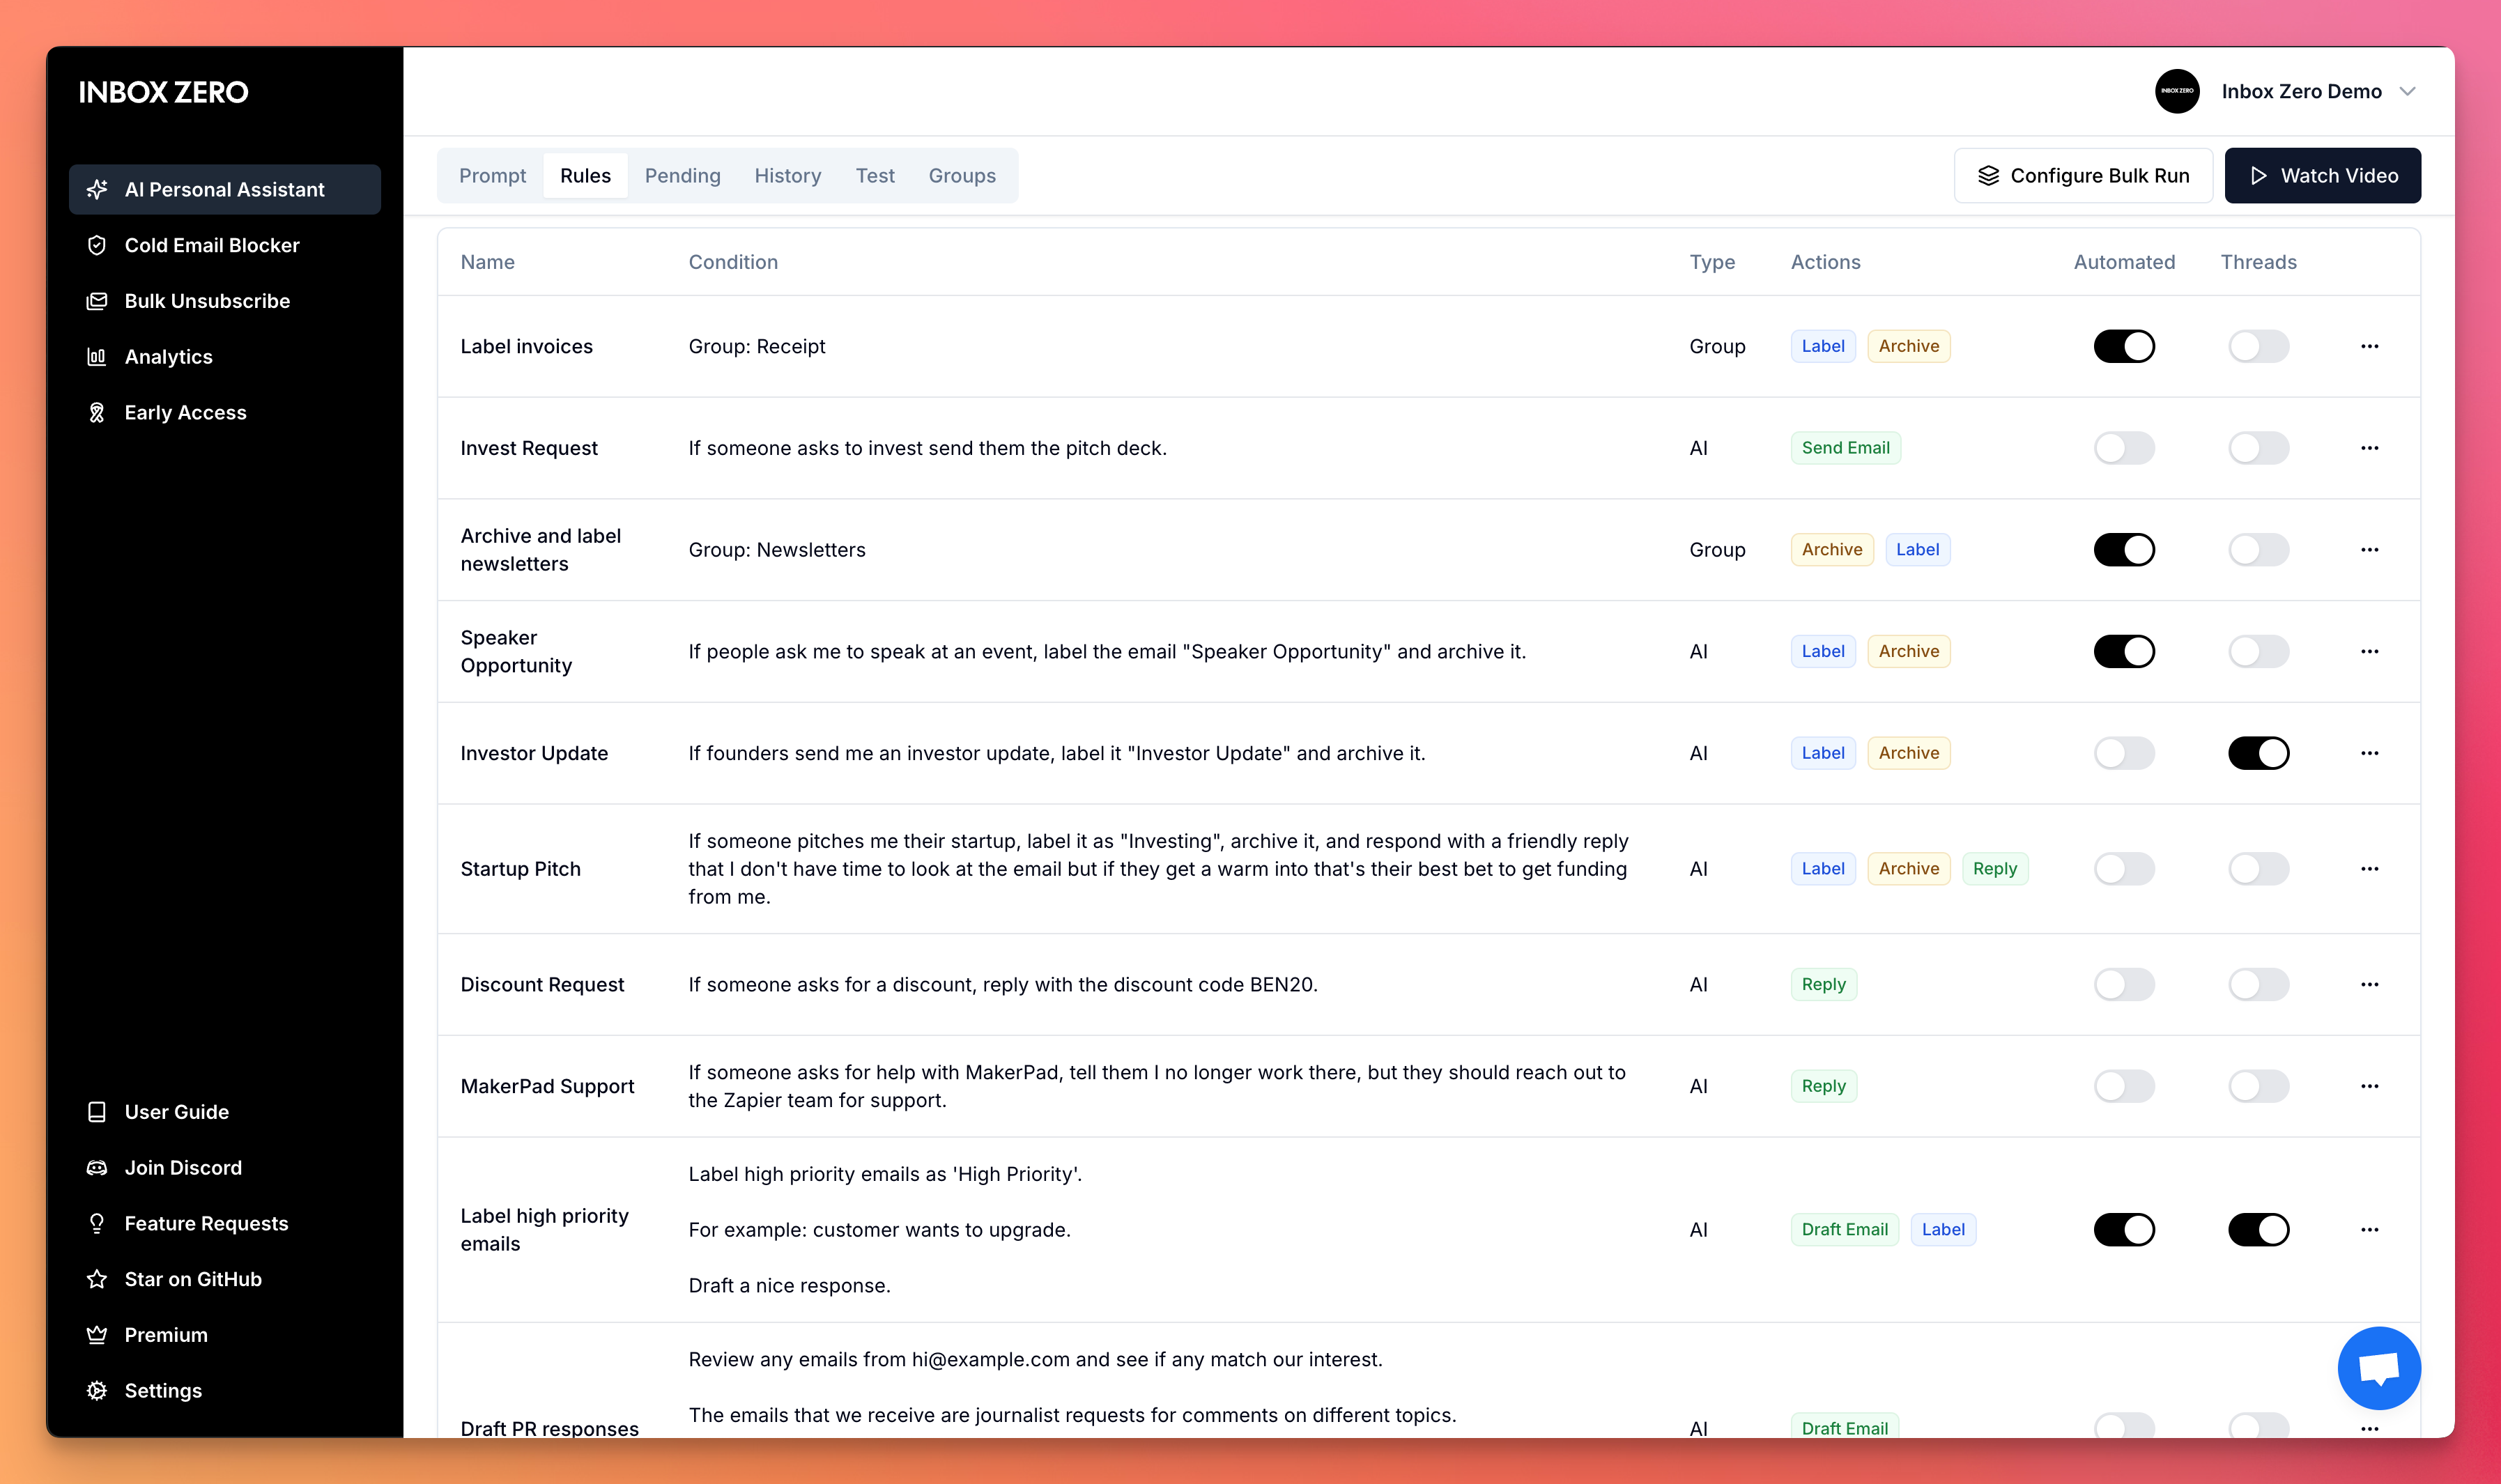
How Rules Work
Rules are broken into two parts:- The condition to match against.
- The action to take when the AI finds a match.
Conditions
There are two main types of conditions:- AI: Write an instruction for the AI to match against the email.
- Static: Match against a static value:
From,To, orSubject.
Apply this rule if this email is asking me to set up a call.
When an email is received, the AI will use the prompt to determine if the email matches the condition.
Static Conditions
You can match against a static value: From, To, or Subject.
For example:
From: @email.com
This will match against any email that has @email.com in the From field.
The benefit of using static conditions is that they don’t require AI processing on every email, leading to greater efficiency and reliability.
Learned Patterns
Our AI automatically learns your behavior over time - no setup required! The system observes how you interact with emails and adapts accordingly. Viewing Learned Patterns- Click into any rule to see its learned patterns
- Usually, you don’t need to modify these
- Advanced users can manually adjust patterns if needed
Actions
Actions are what the AI does when a condition is met. You can add multiple actions to a single rule. Available actions:- Archive
- Label
- Reply
- Forward
- Send Email
- Draft Email
- Mark Read
- Mark Spam
- Move to Folder
- Call Webhook
- Delayed Actions (archive or perform actions after a set time)
{{prompt}}.
Example:
{{...}} placeholders will remain exactly as written.
Apply to Threads
When “Apply to Threads” is disabled on a rule, that rule is skipped for replies and only runs on the first email in a conversation. This is useful for rules that target standalone emails like newsletters or receipts — disabling it means the AI evaluates fewer rules on threaded emails, improving speed and accuracy.When Multiple Rules Can Apply
If multi-rule selection is off, the AI normally chooses one rule. A few automatic behaviors can still add another label:- A static rule, like
Fromcontains@company.com, can label an email asTeamwhileTo Replyadds a draft if the message needs a response. - If a thread was already marked
To ReplyorAwaiting Reply, replies in that thread can keep the conversation moving between those labels. - A message like “Does Wednesday at 2pm work?” can be labeled
Calendarand alsoTo Reply, so you get a draft response. Calendar invite files and event reminders stayCalendaronly.
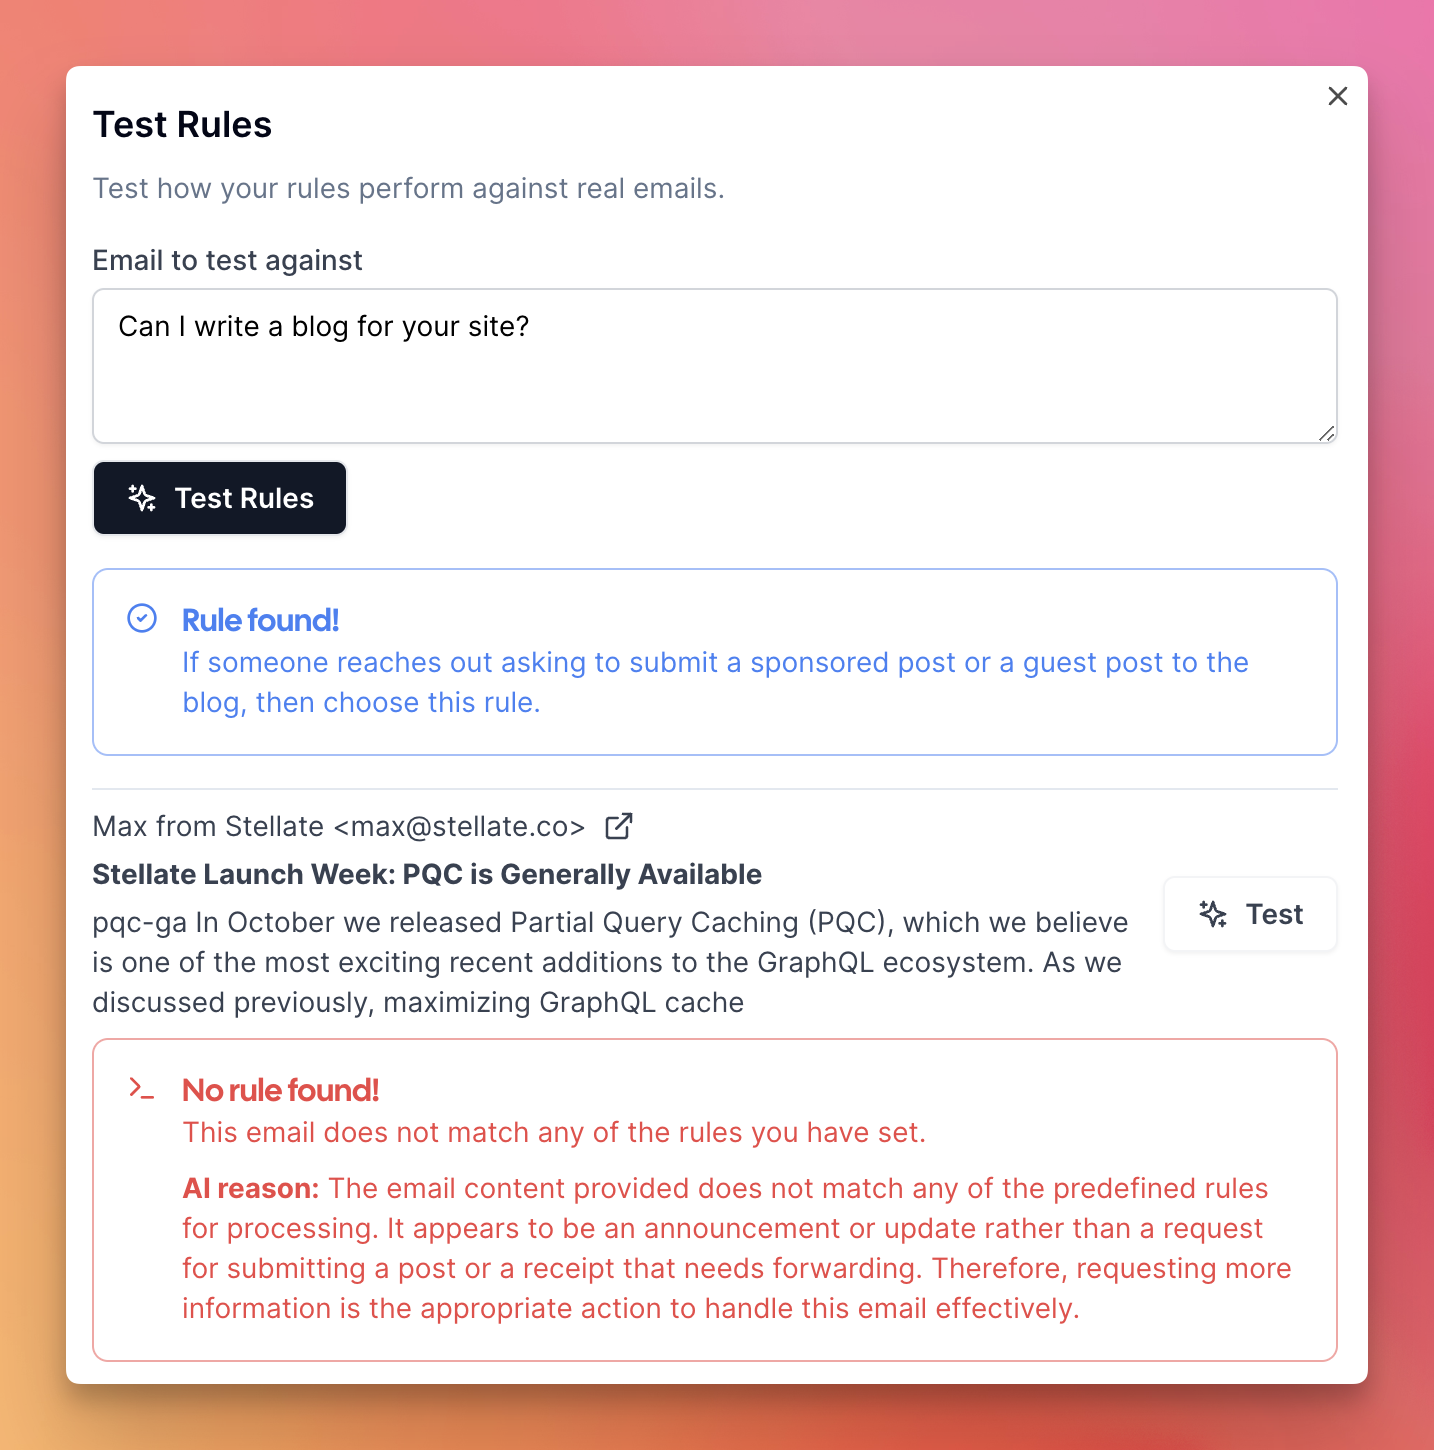
Test Rules
You can test your rules by going to the Test tab. This will show you a list of emails. When you clickTest, the AI will run the rule against the email and show you which rule it matched against (if any).
You can also enter free-form text to test your rules.
To test all rules quickly, click Test All.
Fix Rules
If a rule isn’t behaving as expected (e.g., incorrectly marking emails as “to reply”):- Go to the History tab
- Search for the problematic email
- Click
Fix - Explain why this email shouldn’t match the rule
- The AI will adjust the rule accordingly