-
Configure consent screen:
Go to Credentials. If the banner shows up, click it and then click
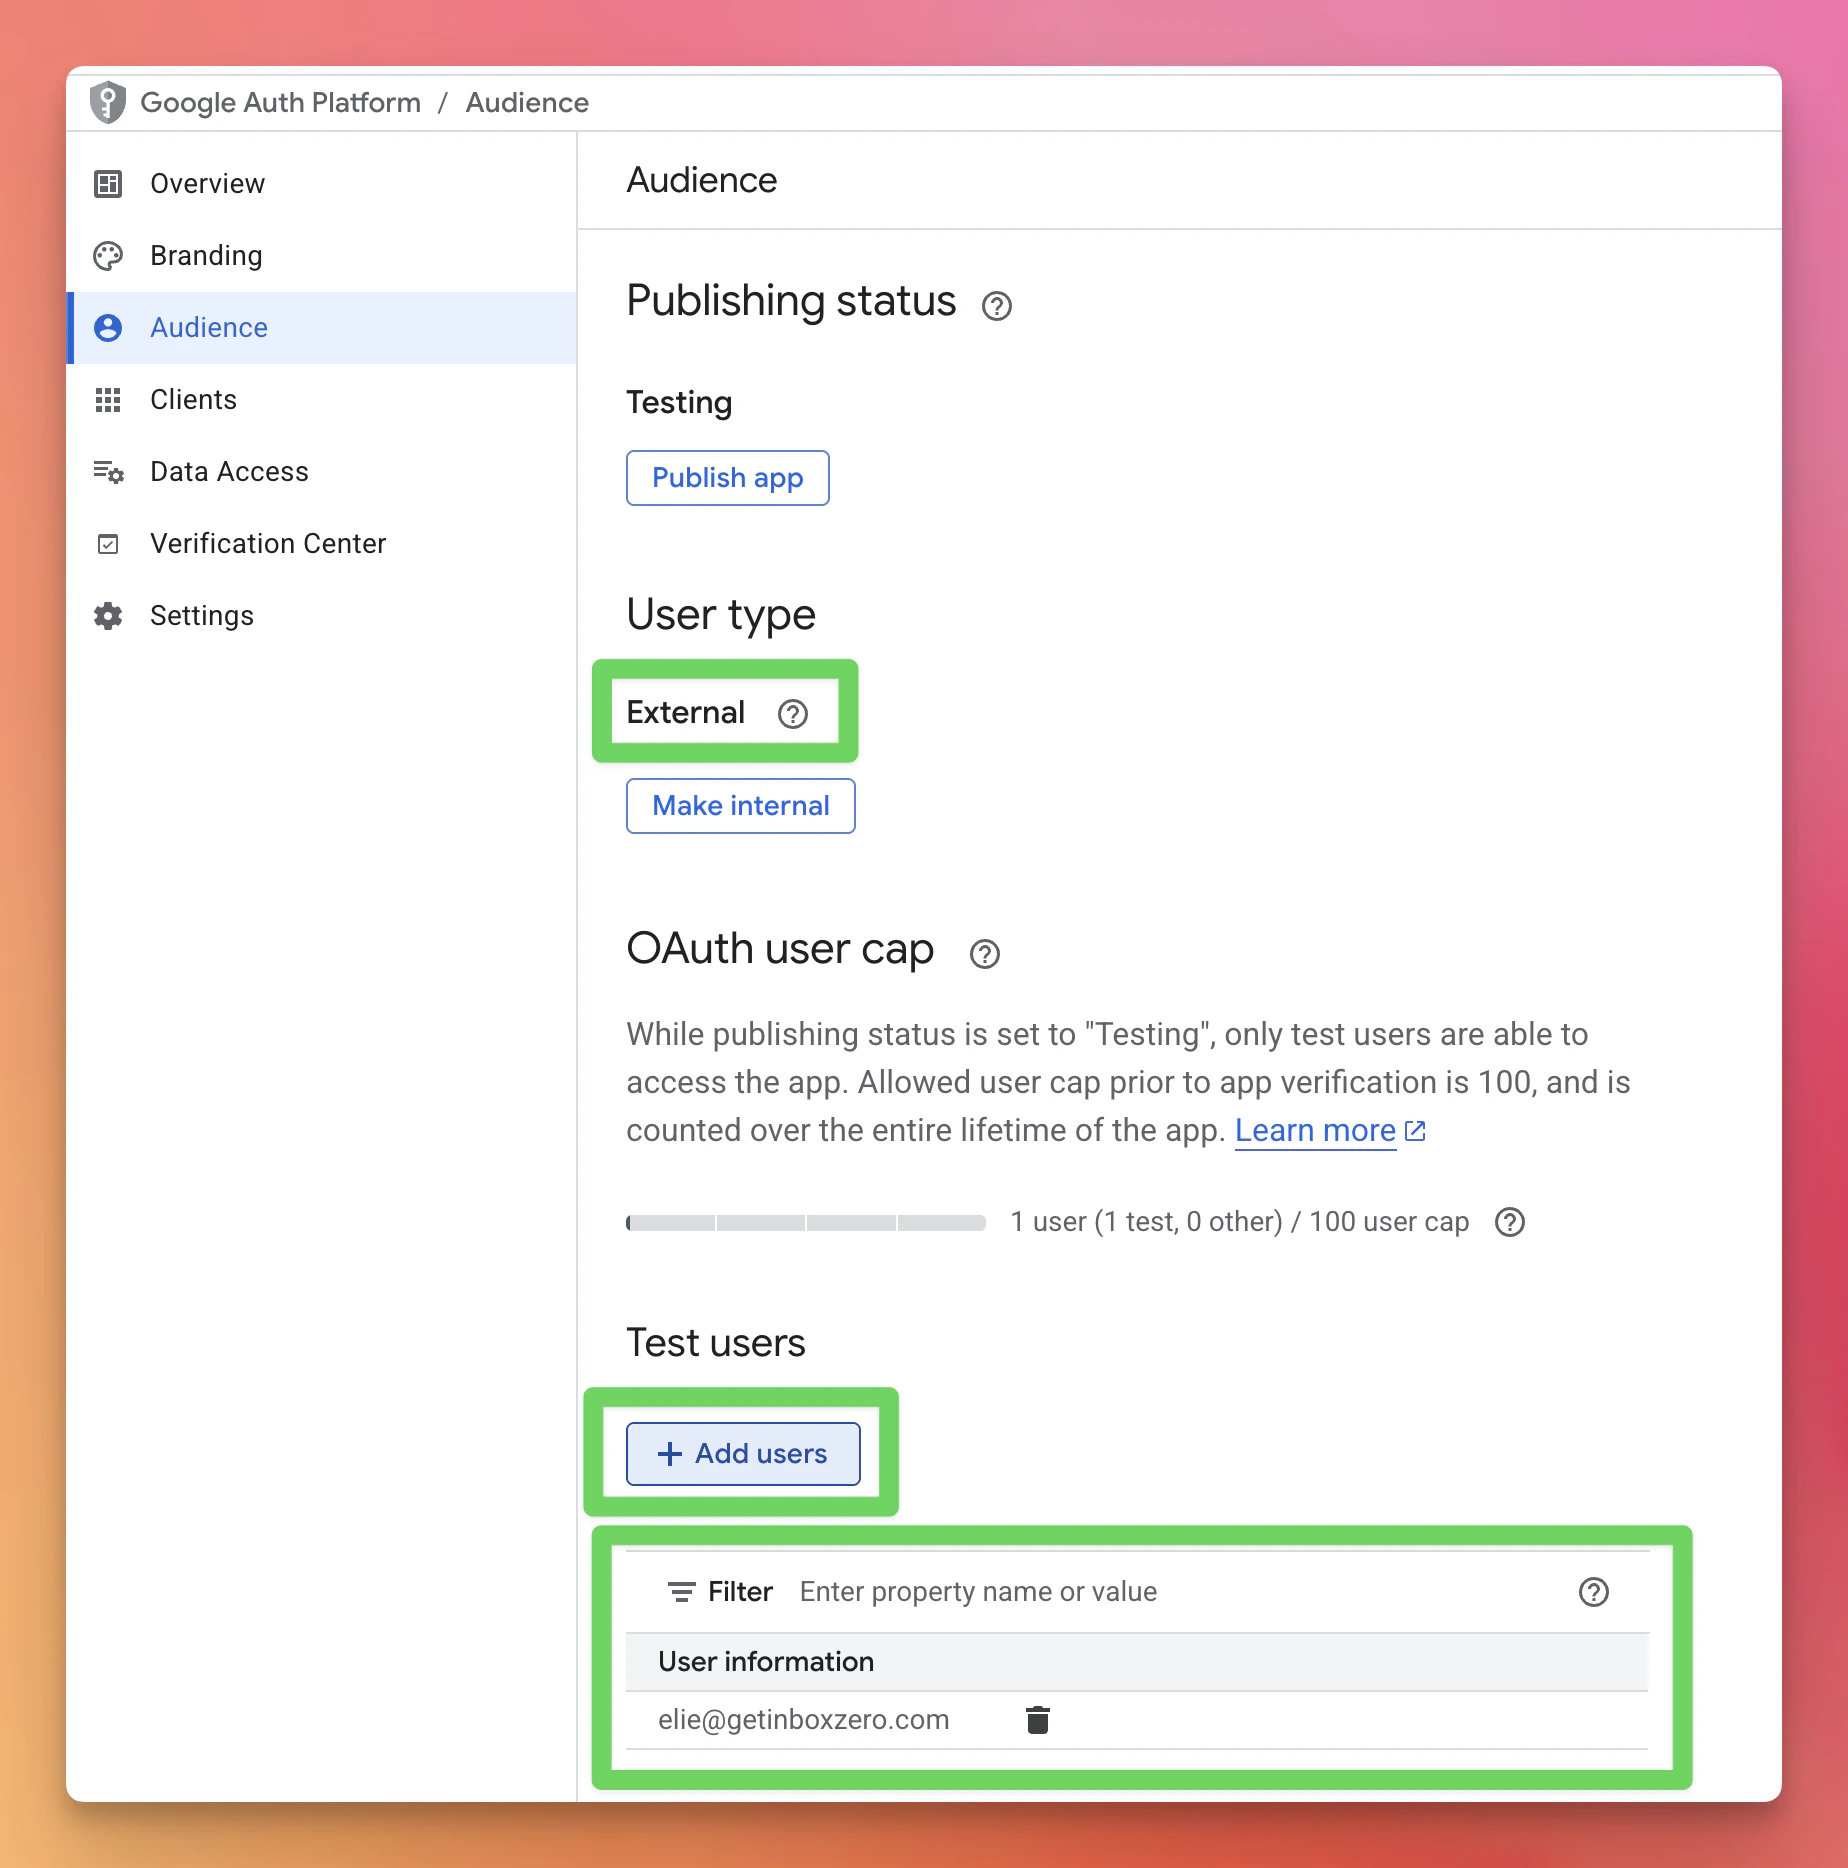
Get Started. Follow the prompts to name your app and set your contact email.- Internal — Google Workspace only. All members of your organization can sign in without additional setup. Personal Gmail accounts cannot use Internal apps.
- External — any Google account, including personal Gmail. You’ll need to add yourself as a test user (see step 5 below).
-
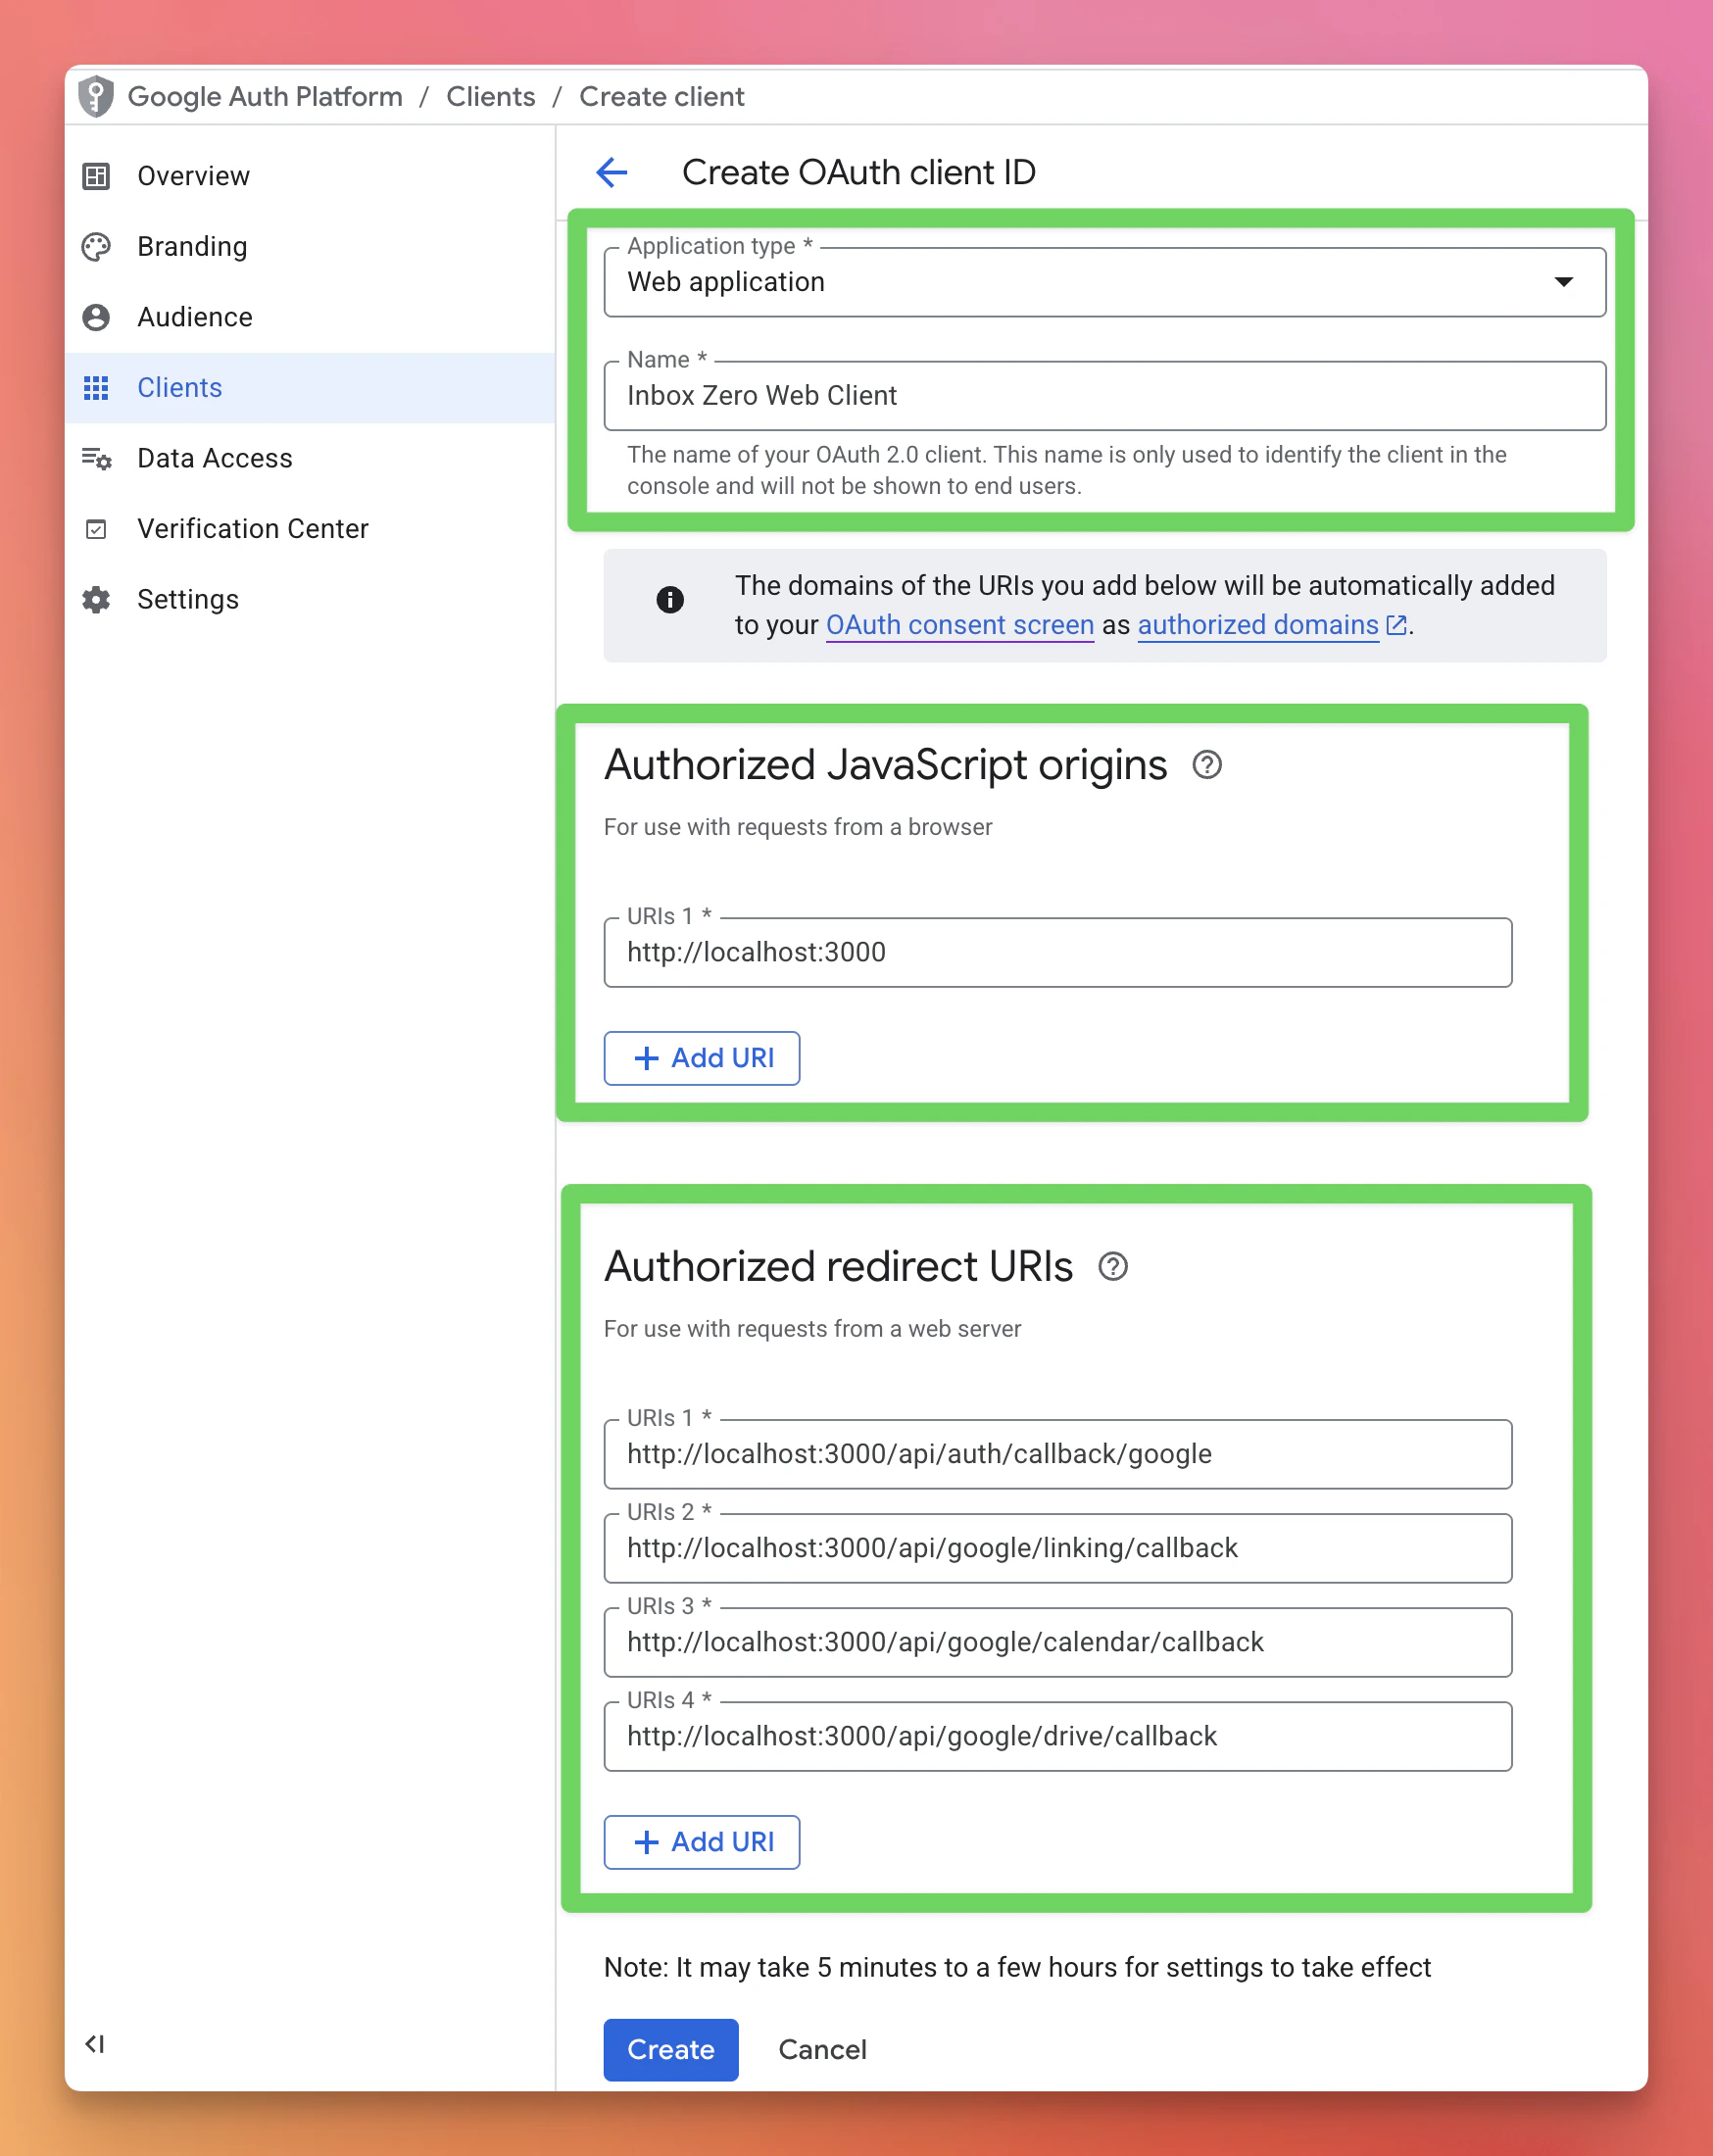
Create OAuth credentials:
- Click
+Create Credentials>OAuth Client ID. - Application Type:
Web application. - Authorized JavaScript origins:
http://localhost:3000(replace with your domain in production) - Authorized redirect URIs (replace
localhost:3000with your domain in production):http://localhost:3000/api/auth/callback/googlehttp://localhost:3000/api/google/linking/callbackhttp://localhost:3000/api/google/calendar/callback(optional, for calendar)http://localhost:3000/api/google/drive/callback(optional, for Drive)
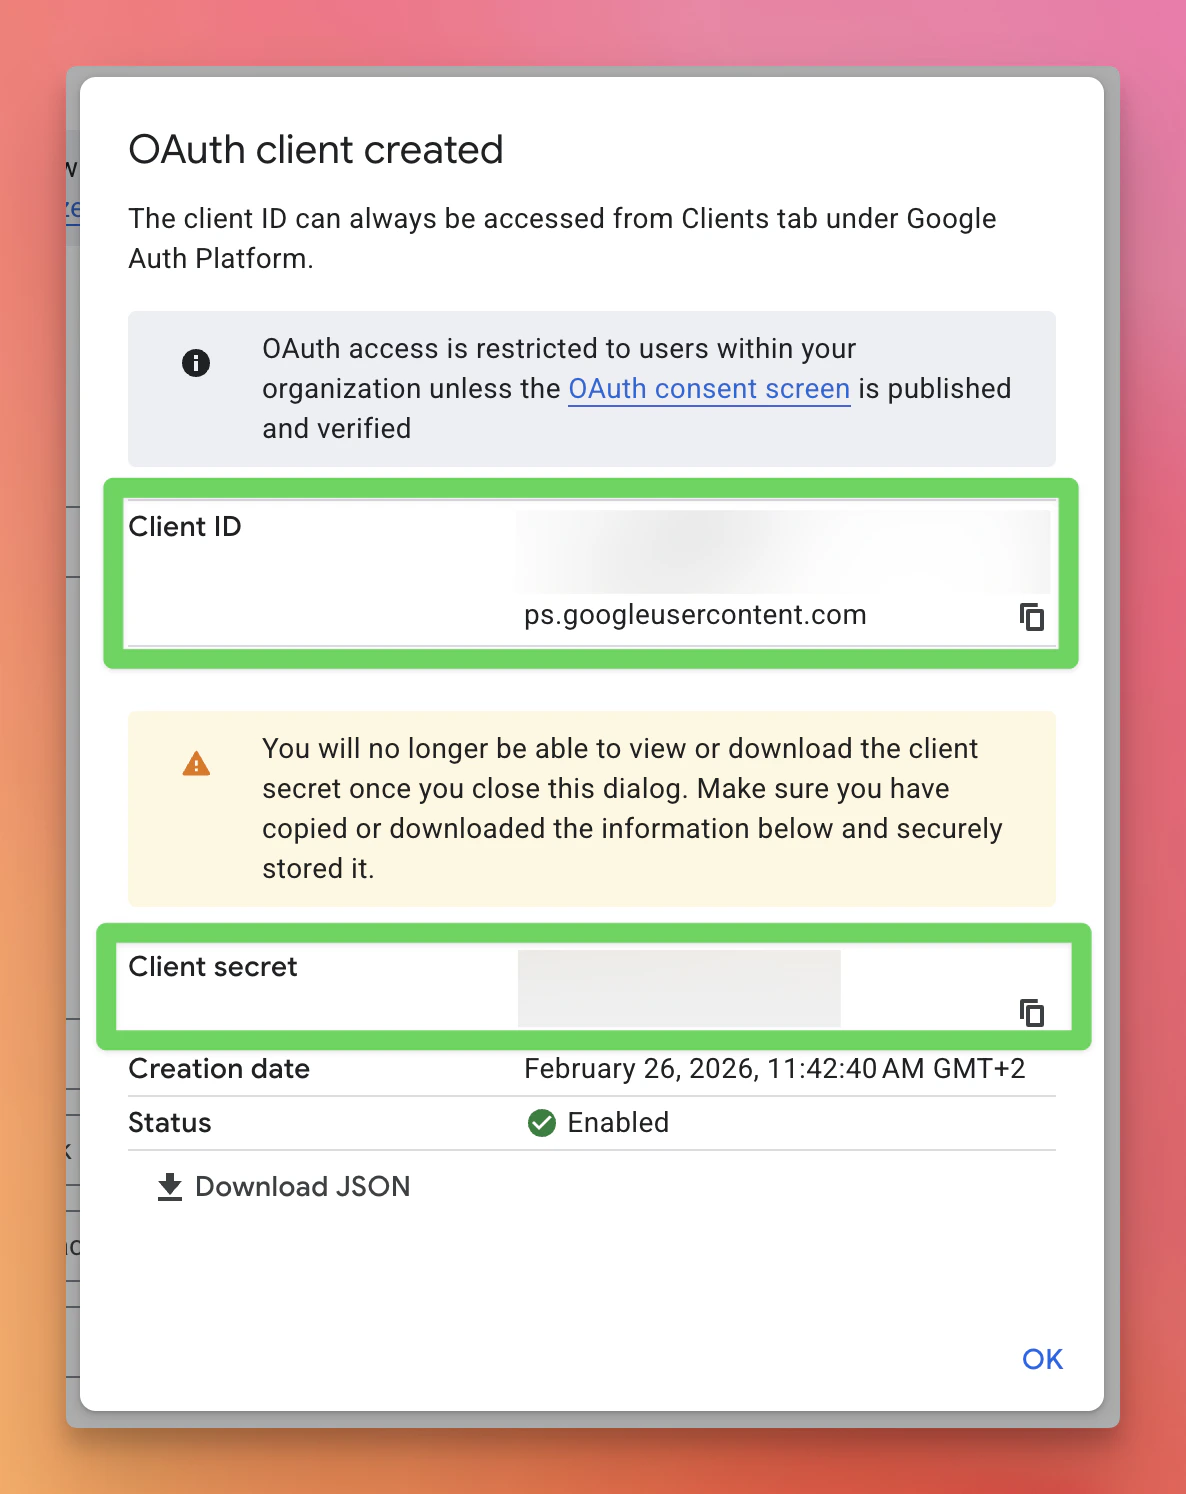
- Click
Createand copy the Client ID and secret.

- Click
-
Update
.envfile:- Set
GOOGLE_CLIENT_IDandGOOGLE_CLIENT_SECRET.
- Set
-
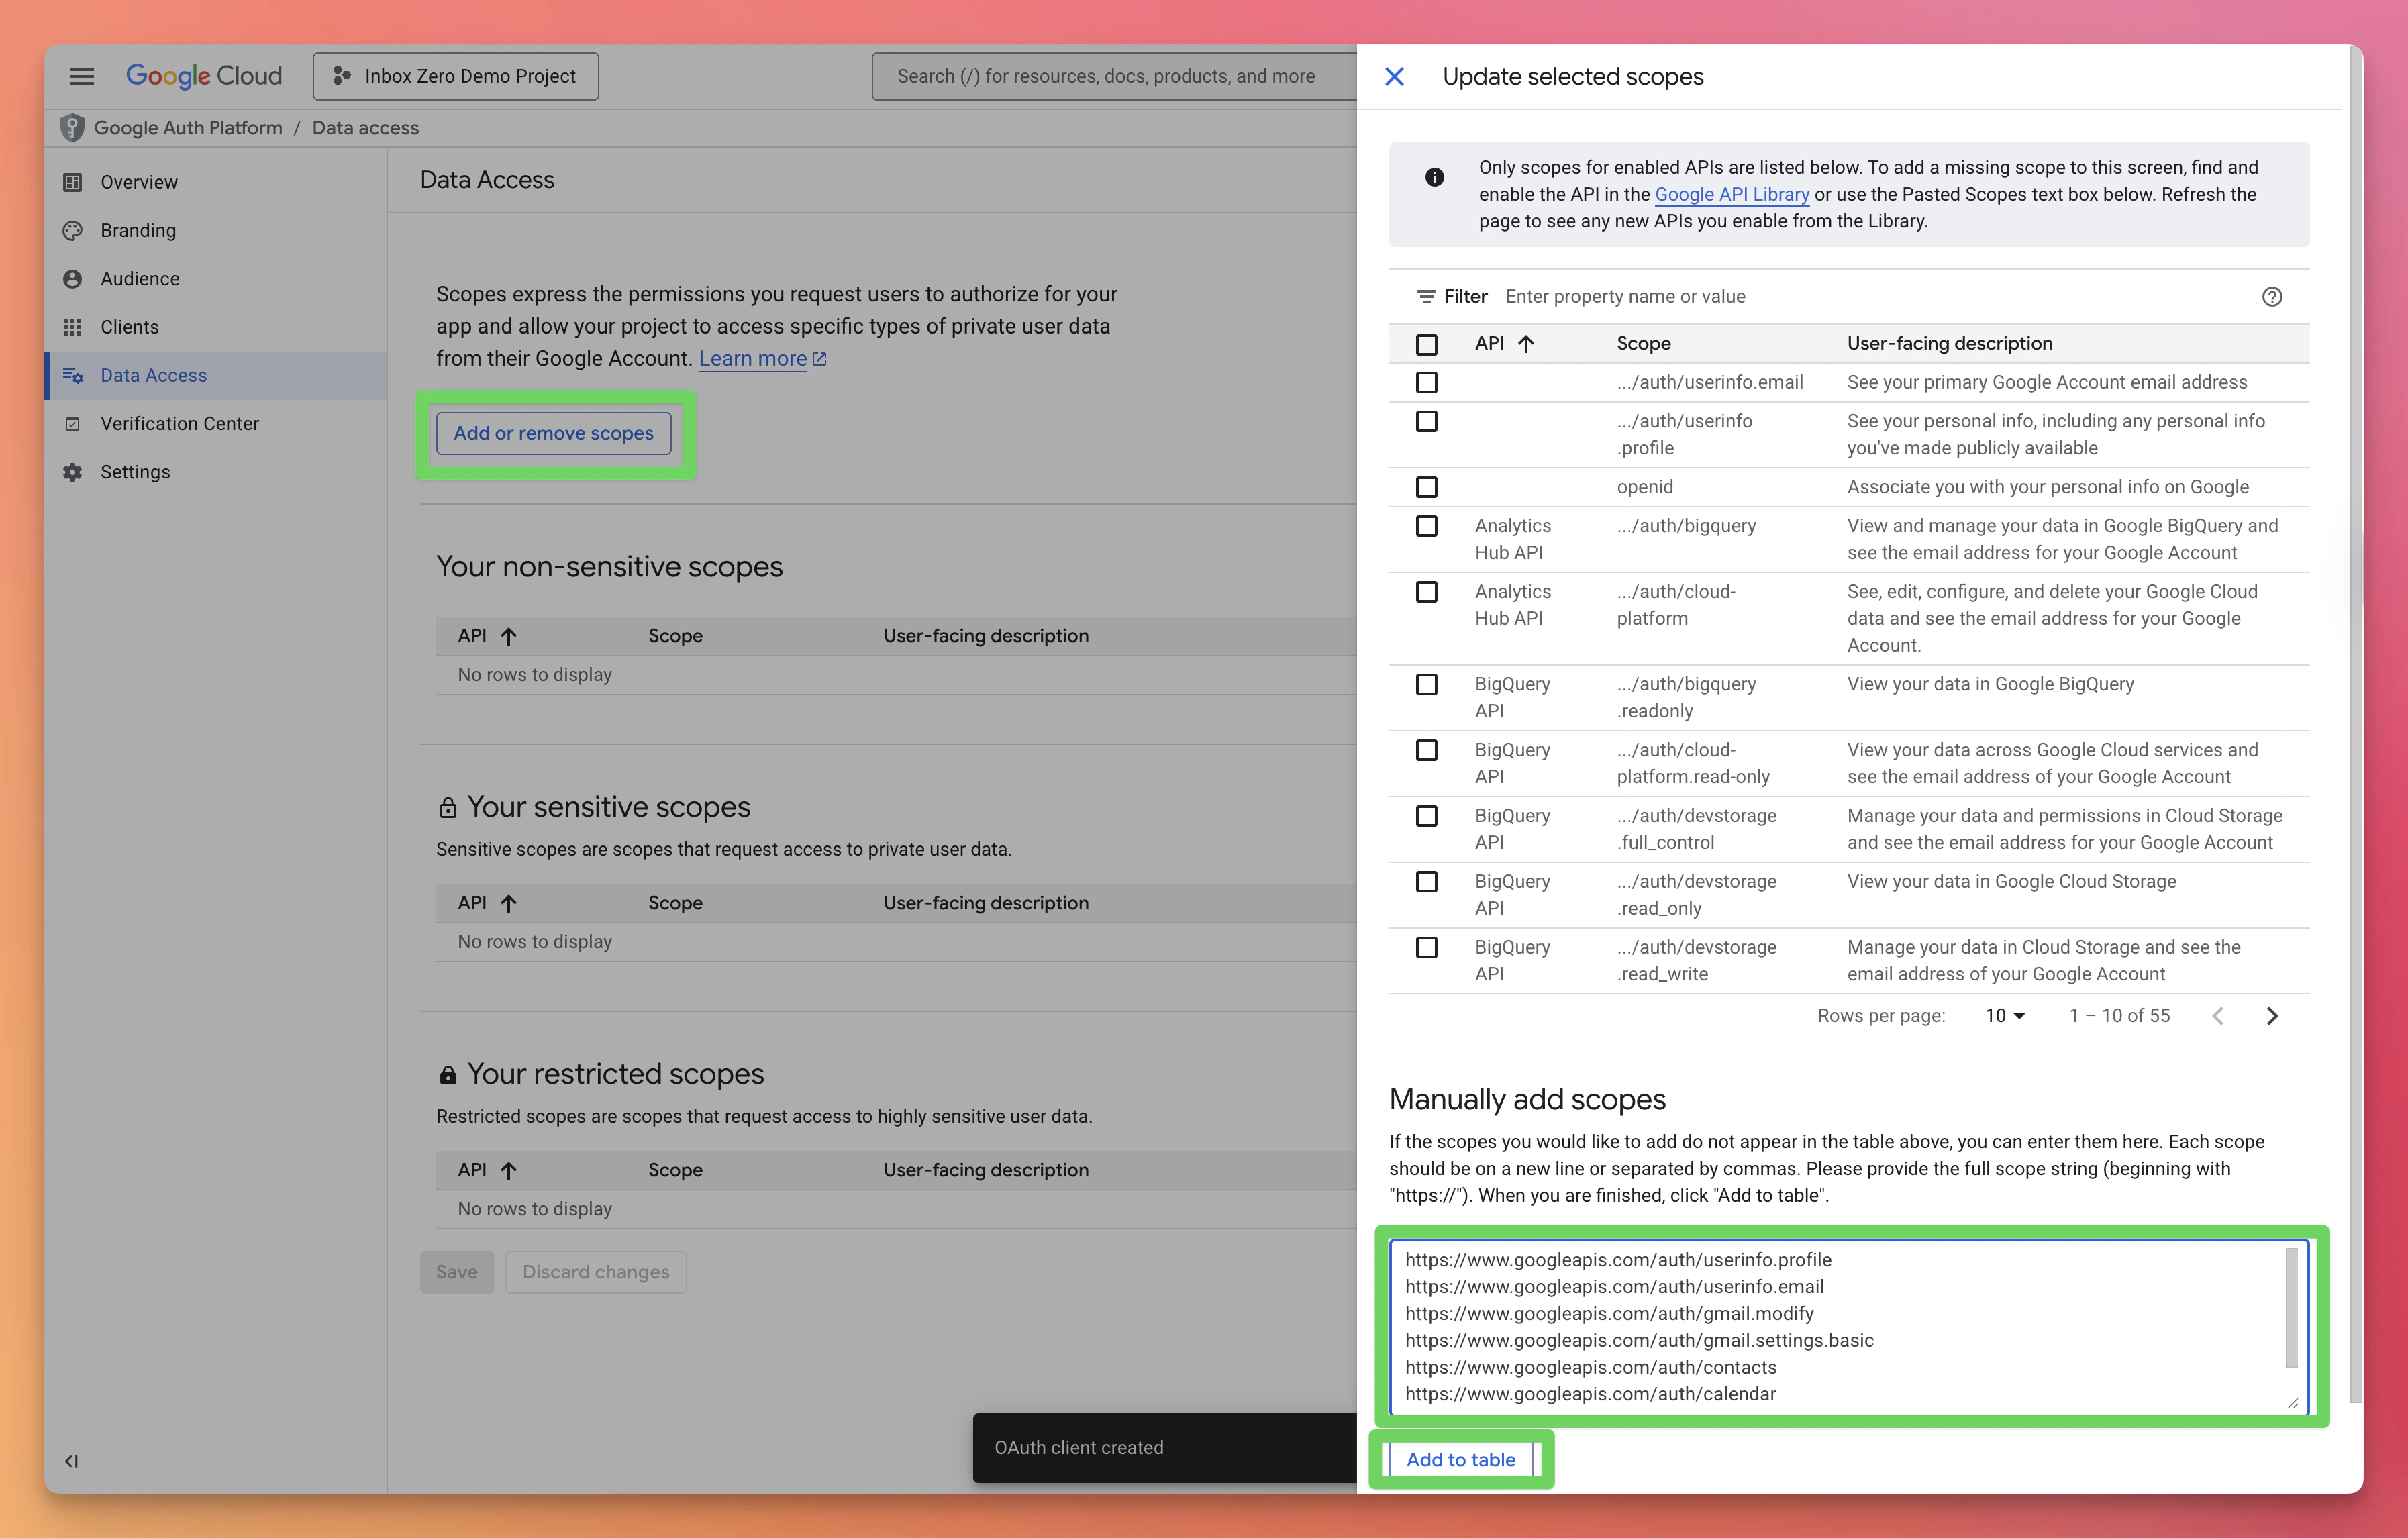
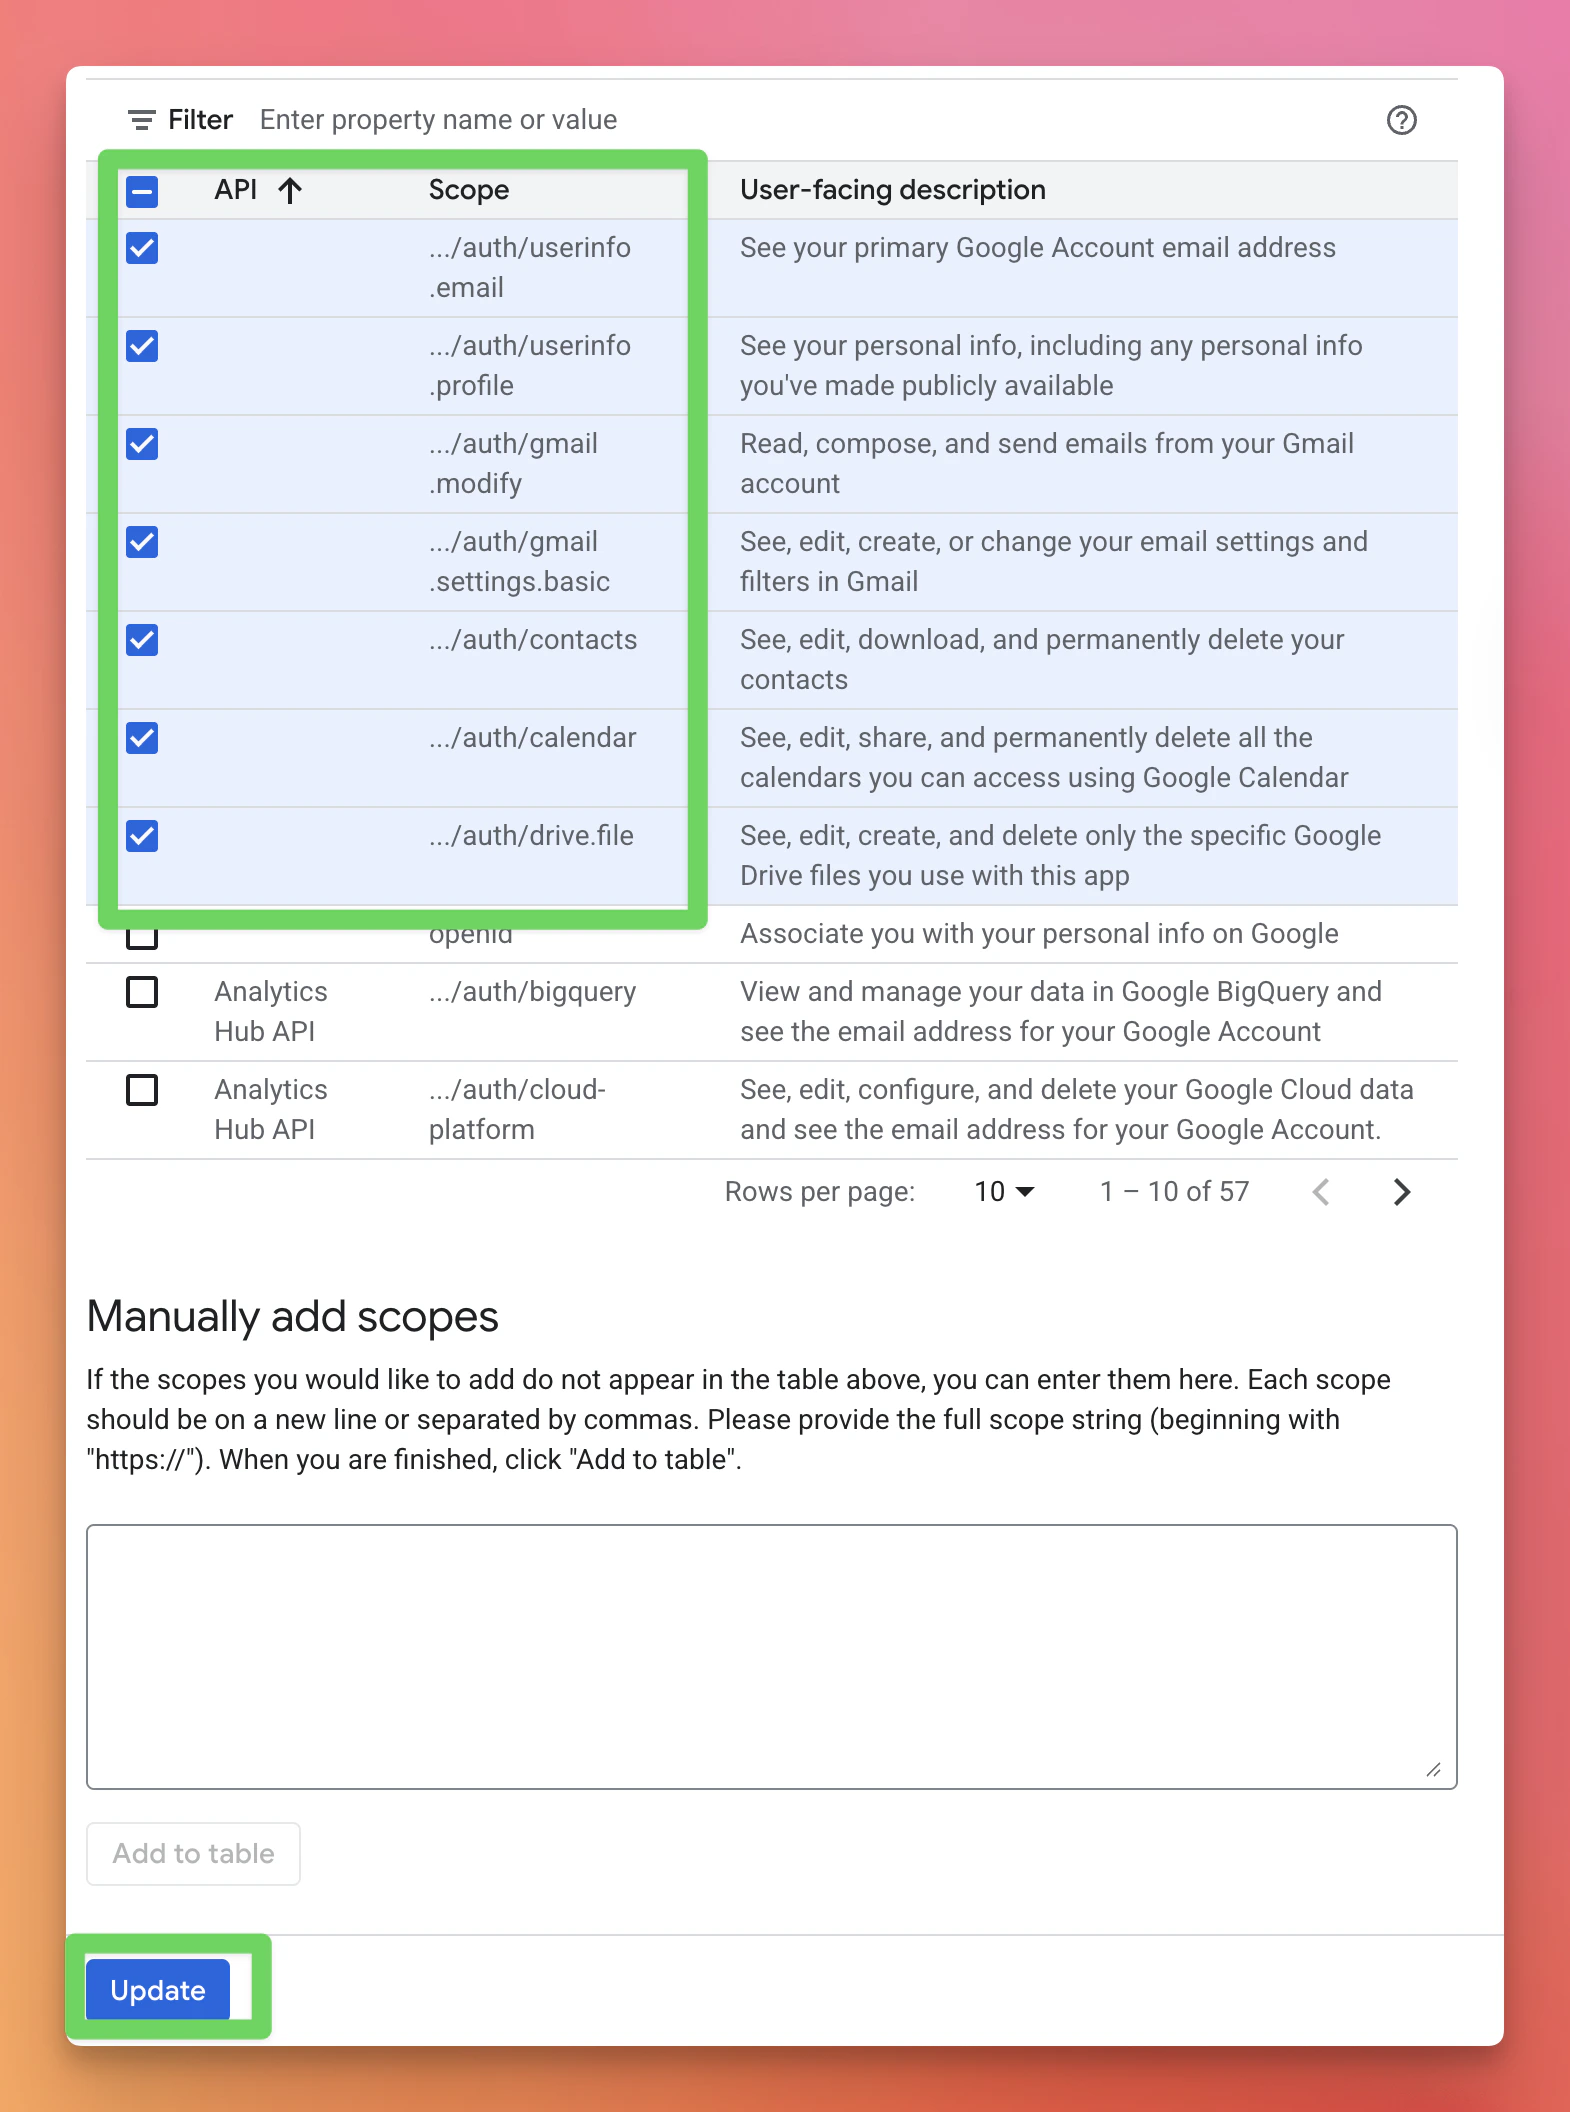
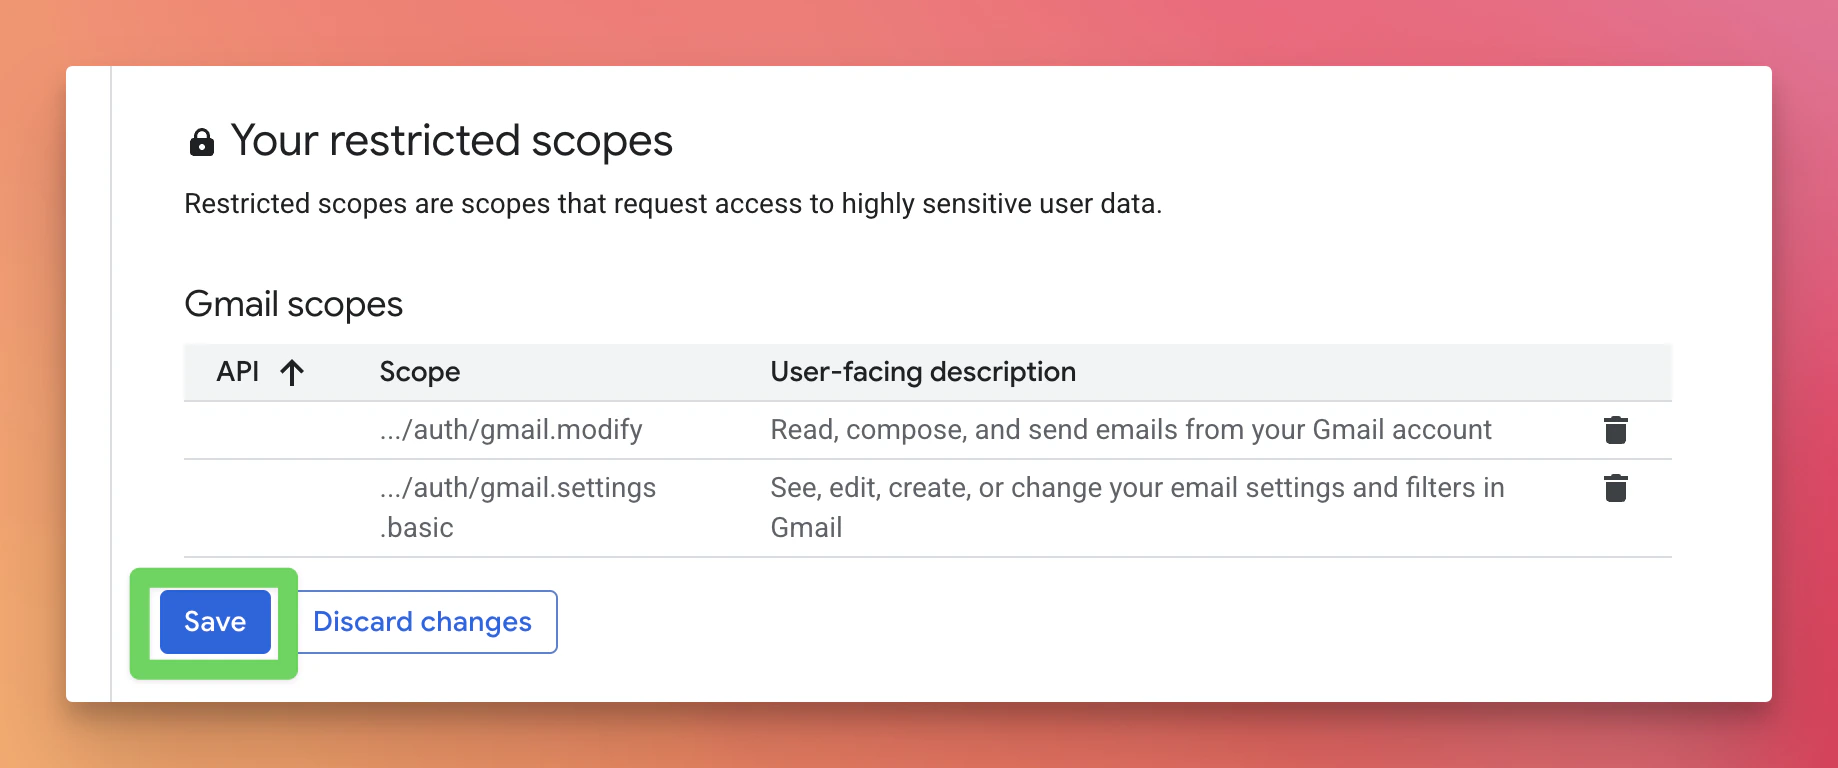
Update scopes:
- Go to
Data Accessin the sidebar. - Click
Add or remove scopes. - Manually add these scopes:
- Click
Update, thenSave.
- Go to
-
Add yourself as a test user (External only):
- Go to Audience.
- In
Test users, click+Add usersand enter your email.
-
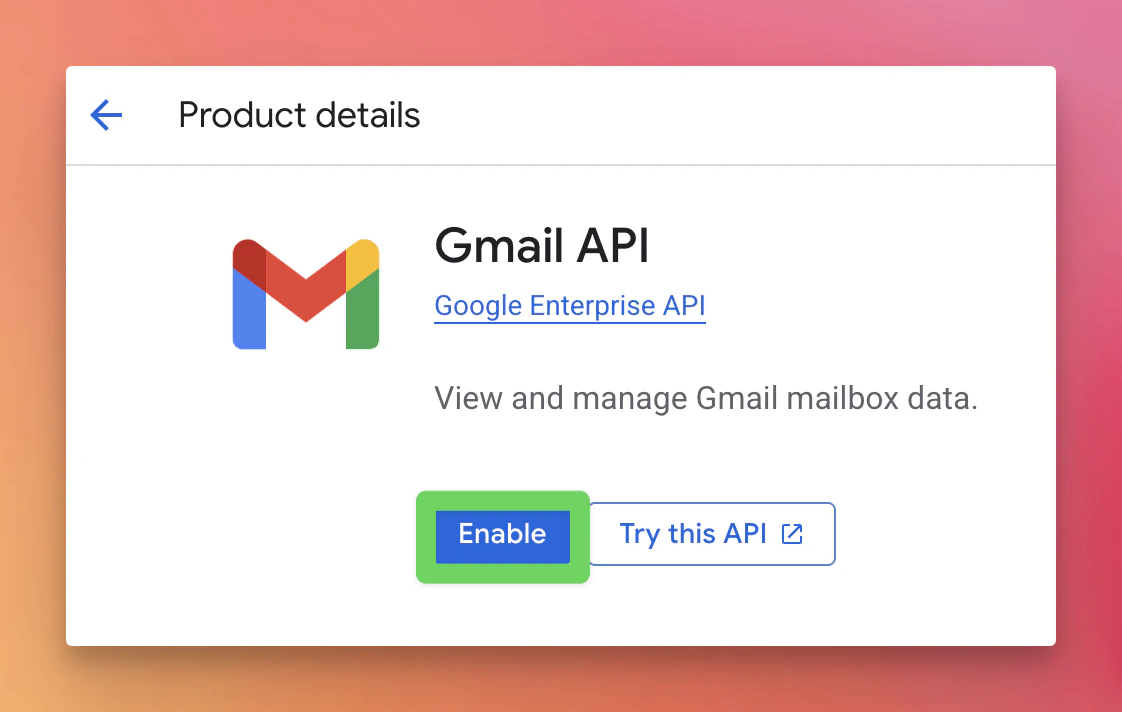
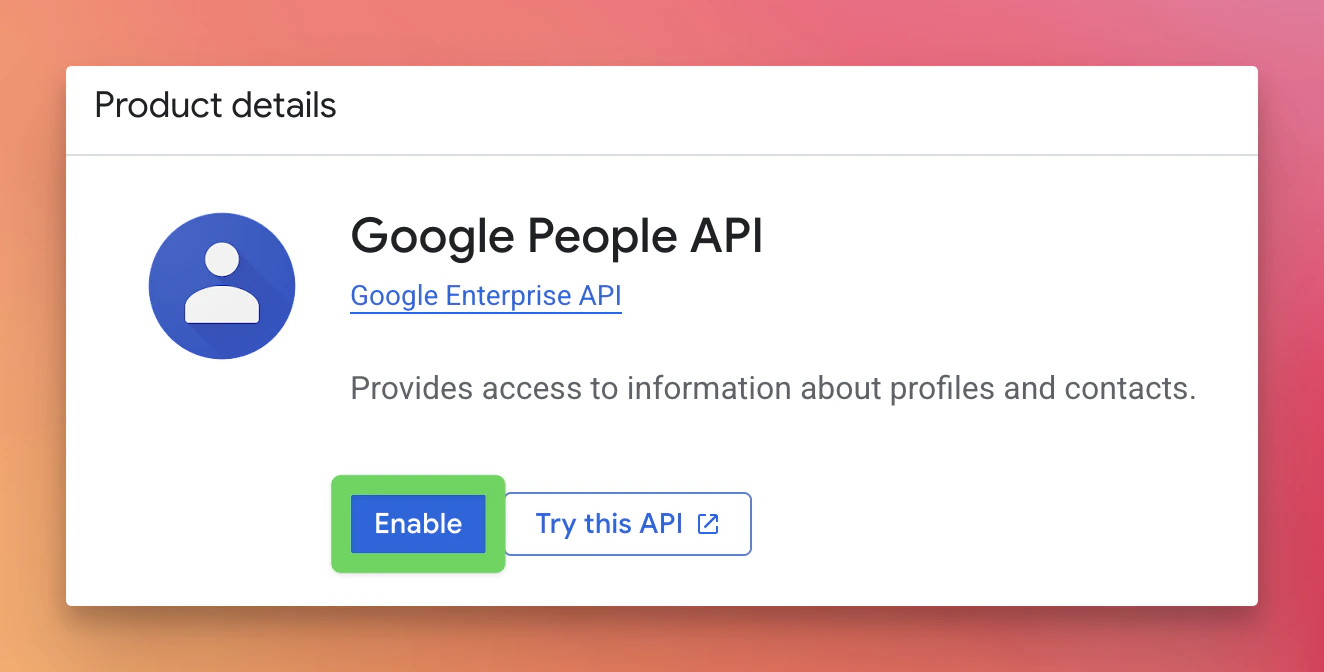
Enable required APIs:
- Gmail API (required)
- Google People API (required)
- Google Calendar API (optional)
- Google Drive API (optional)
Setup Guides
Google OAuth
Configure Google OAuth credentials, scopes, and required APIs
Go to Google Cloud Console and create a new project if necessary.